
What Is the UP DigiShakti Portal
The UP DigiShakti Portal is a digital platform launched by the Uttar Pradesh Government to empower students and filmmakers with access to free resources and public services. Students can register for free tablets or smartphones provided by the state, while the portal also supports the film industry by offering data on approved films, shooting locations, and available subsidies. Users can securely log in and verify their identity via the Meri Pehchaan system, allowing them to check their registration or application status online.
DigiShakti Portal for Students: Core Purpose & Importance
The DigiShakti Portal is a lifeline for students in Uttar Pradesh colleges and universities. It offers free tablets or smartphones to help students access digital education and career tools. Students can easily register online, check their name in the student list, and track their status. The portal is directly linked with Meri Pehchaan for fast and secure login.
🧠 Why It Matters
- Reduces the digital gap in rural and semi-urban areas
- Makes online classes, study apps, and exams accessible
- Helps students prepare for competitive exams, jobs, and skill-based training
- Saves time by offering a one-stop platform for updates, device lists, and verification
DigiShakti Portal: Boosting Uttar Pradesh’s Film Industry
The DigiShakti Portal is not limited to students—it also plays a key role in supporting the film industry in Uttar Pradesh. It acts as a centralized digital hub offering details on government-approved films, shooting locations, celebrity events, and available subsidies. Filmmakers can easily apply for permissions and financial support through a transparent, online process. This system makes it easier for independent and regional filmmakers to navigate the requirements without needing direct access to officials or urban offices. By reducing bureaucratic hurdles, the portal encourages creativity and participation in local storytelling. It also promotes job creation across tourism, hospitality, logistics, and post-production services. With direct access to shooting locations and support tools, filmmakers now have a strong reason to bring their projects to Uttar Pradesh—contributing to both economic growth and cultural visibility.
DigiShakti Scheme for Students: Eligibility & Benefits
The DigiShakti Scheme is meant for students studying in government-recognized colleges and universities in Uttar Pradesh. To receive a free tablet or smartphone, students must meet some basic conditions.
✅ Eligibility Criteria:
- Must be enrolled in a recognized college or university in UP
- Aadhaar should be linked to an active mobile number
- Student data must be uploaded by the institution to the DigiShakti database
- Eligibility may vary by academic year, course type, or student category (SC, ST, OBC, General)
Once verified, the student’s name appears in the official student list under the scheme. The goal is to ensure fair access to digital tools for learning and skill development.
UP DigiShakti Portal e-KYC Verification Process
To complete the e-KYC verification on DigiShakti Portal using MeriPehchaan, follow these steps:
Access the DigiShakti Website
Visit the official UP DigiShakti Portal at https://digishakti.up.gov.in/
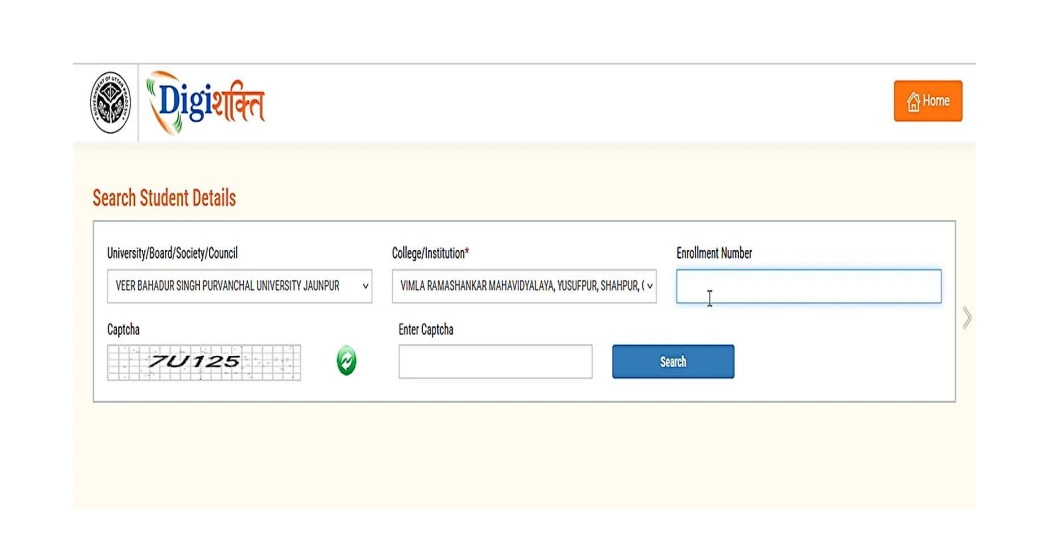
Enter Student Details
Select your University/Board/Society/Council, College/Institution, enter your enrollment number and captcha, then click “Search” button.
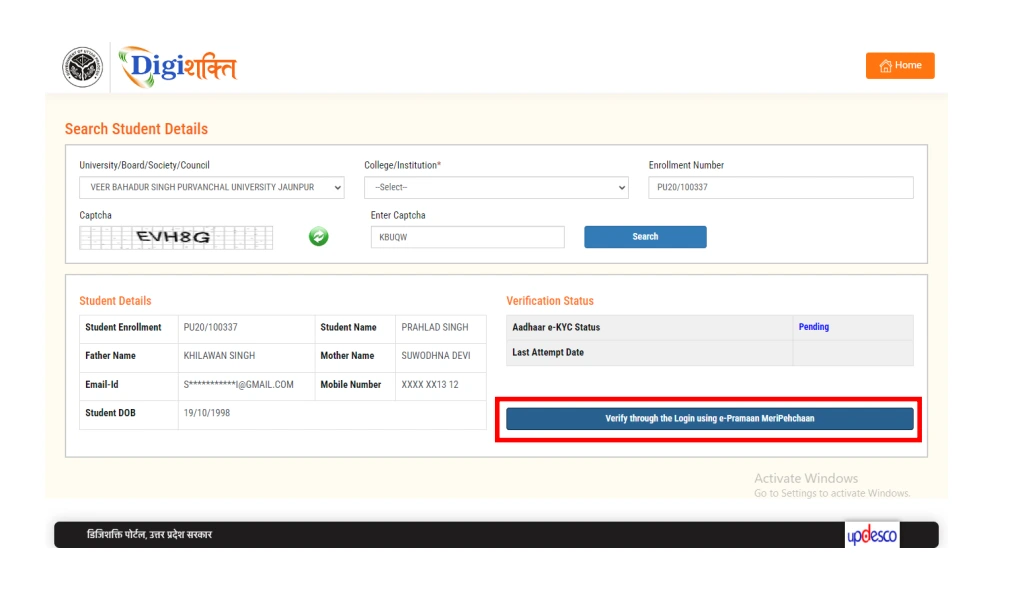
Verify Student Information
Your details will be displayed on screen. If your Aadhaar e-KYC status shows “Pending”, click on “Verify through the Login using e-Pramaan MeriPehchaan” button.
MeriPehchaan Sign-Up/Sign-In
You’ll be redirected to the MeriPehchaan portal. If you’re a new user, click on “New user? Sign up for MeriPehchaan”. If you’re an existing user, sign in with your credentials.
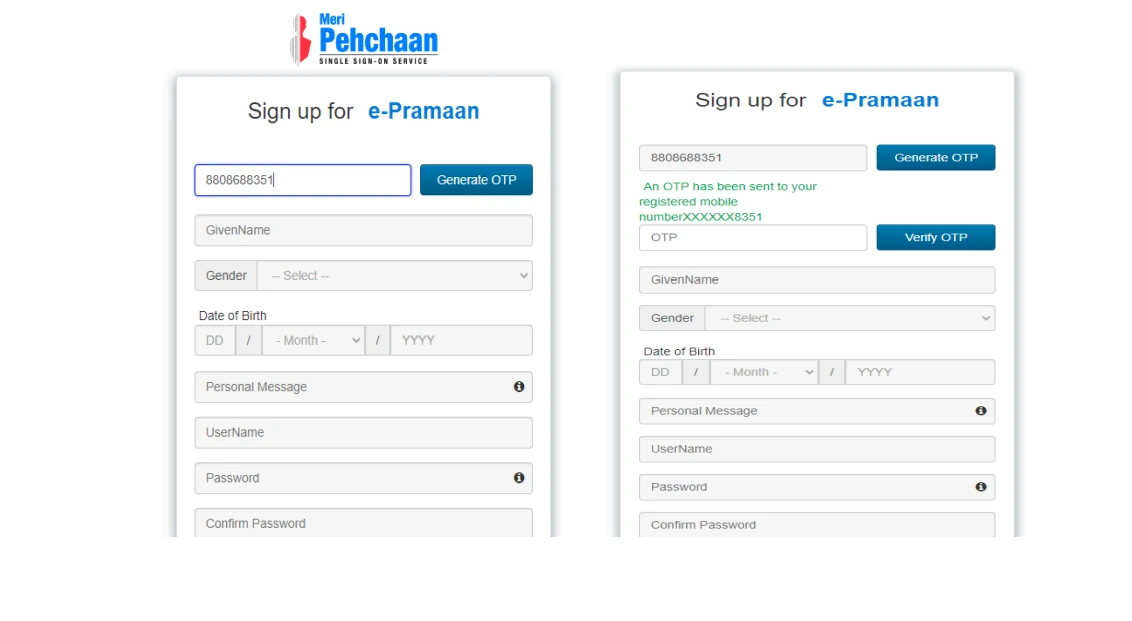
New User Registration (For new users only)
Enter your mobile number and verify it using OTP. Fill in your personal details exactly as they appear on your Aadhaar card:
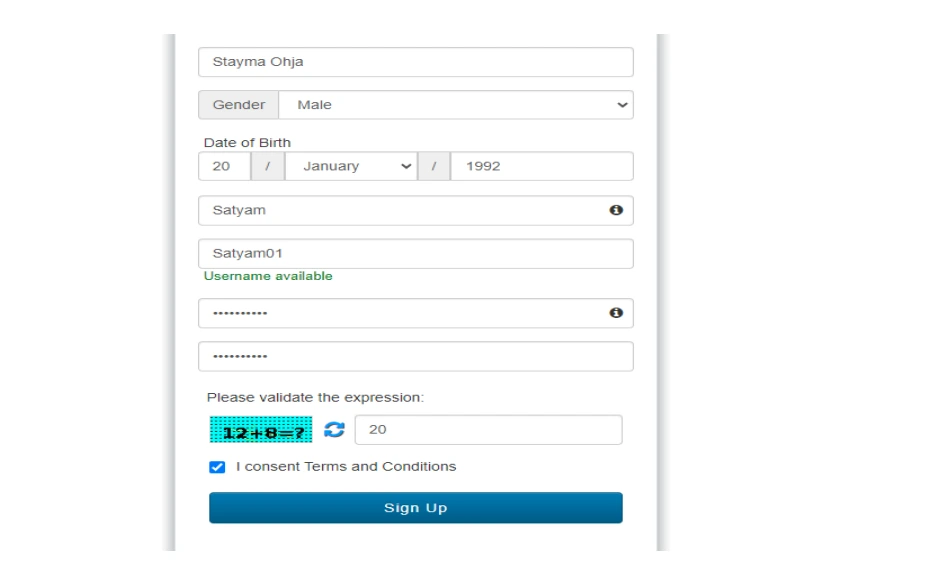
- Full name (as per Aadhaar)
- Date of birth (as per Aadhaar)
- Gender (as per Aadhaar)
- Create username and password
- Accept terms and conditions
Aadhaar e-KYC
Complete the Aadhaar e-KYC verification:
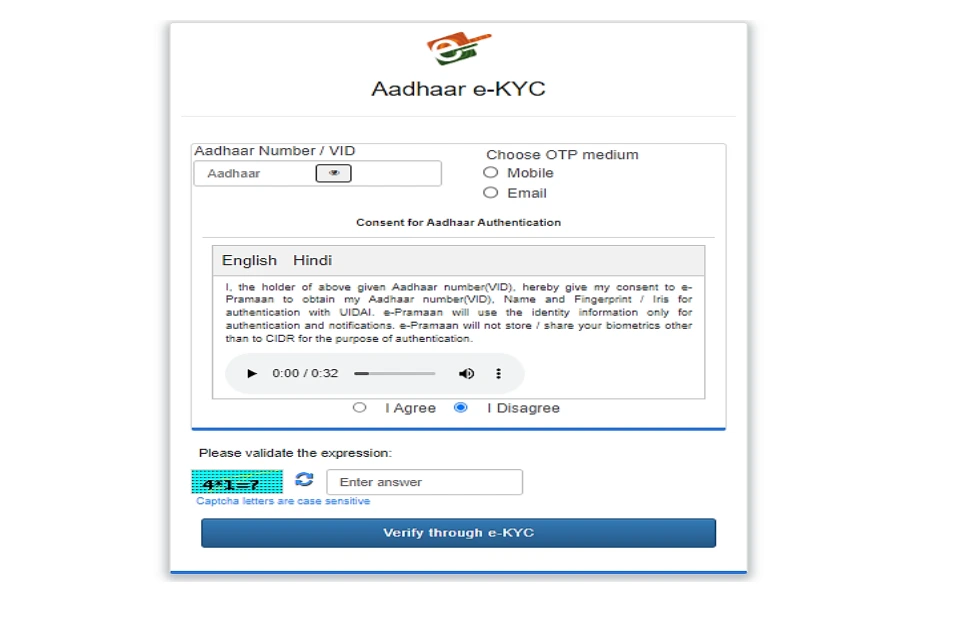
- Enter your Aadhaar number
- Choose OTP medium (mobile or email)
- Click on “verify through eKYC” button
- Enter the OTP received on your Aadhaar-linked mobile/email
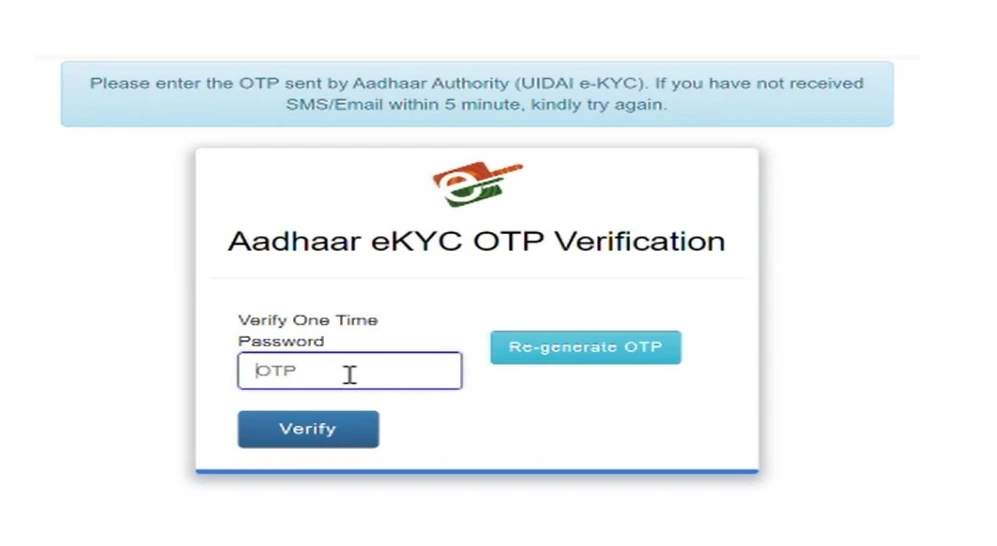
Verification Complete
Upon successful verification, you’ll see a success message and be redirected back to the DigiShakti portal.

🔎 Requirements for Verification:
- Aadhaar card with correct details (name, DOB, gender)
- Access to Aadhaar-linked mobile or email for OTP
- Enrollment number from your educational institution
- Your institution must have uploaded your correct details to the portal
- Your data must match between institutional records and Aadhaar
Documents Required for Registration & Verification
To register and complete eKYC on the DigiShakti Portal, students need a few essential documents. These documents help verify identity and confirm enrollment status through the Meri Pehchaan Portal.
📌 You’ll Need:
- Aadhaar Card (linked with your mobile number for OTP verification)
- College ID card or Enrollment Certificate issued by your institution
- Active mobile number (must match Aadhaar record)
- Meri Pehchaan ID (used for secure login on the online portal)
⚠️ Note: If your mobile number is not linked to Aadhaar, complete that process at the nearest Aadhaar center first.
How to Register & Complete e-KYC on the DigiShakti Portal (2025 Guide)
Registering on the DigiShakti Portal and completing eKYC is easy if you follow each step carefully. The process works for both students and college administrators through a secure online portal.
🔒 Make sure your Aadhaar is linked with your mobile number before starting.
👤 For Students
- Visit the official portal:
Go todigishaktiup.inand click on “Student Login.” - Login via Meri Pehchaan:
Sign in using your Aadhaar-linked mobile number and OTP. - New user registration:
Fill in your name, mobile number, Aadhaar, and verify via OTP. - Enter student details:
College name, enrollment ID, course, and year. - Verify Aadhaar for eKYC:
Aadhaar data is matched using OTP. If successful, eKYC is marked “Completed.” - Check status:
Revisit the dashboard anytime to track your eKYC progress.
🏫 For College Admins
- Login through “College Login” on the portal homepage
- Use assigned credentials to access the college admin panel
- Upload or verify student records, Aadhaar numbers, and academic data
- Track student eKYC progress and assist with corrections if needed
DigiShakti Portal Guide: e-KYC Fixes, Tablet Distribution & Benefits
Common eKYC Issues (and Fixes)
- OTP not received: Check mobile network or ensure Aadhaar-mobile link is active
- Aadhaar mismatch: Update your Aadhaar if name or date of birth is incorrect
- Login failure: Retry using a different browser or clear cache
- Keep a screenshot of your final status page for reference
After Registration: What Happens Next?
Once registration and eKYC are done, your college plays the next role. They check your submitted details for accuracy.
What Colleges Do:
- Verify your name, course, Aadhaar, and enrollment ID
- Approve your entry into the official DigiShakti student list
Your Status May Show:
- Approved – You’re eligible for the device
- Under Process – College is reviewing your data
- Failed – Something doesn’t match; you’ll need correction
What Happens Next:
- If approved, you’re moved to the device assignment list
- Tablets or smartphones are dispatched to your college or district center
- You’ll be notified via SMS or the DigiShakti dashboard
What “Failed” Status Means & Its Consequences
If your status on the DigiShakti portal shows “Failed,” it means your verification didn’t go through. This can delay your access to a free tablet or smartphone. Common reasons include Aadhaar mismatches, mobile numbers not linked, or incorrect data uploaded by the college.
- Aadhaar or mobile number mismatch
- Errors during eKYC or Meri Pehchaan login
- Incorrect or incomplete data from college
- Fix the issue as soon as possible to avoid missing out on your device.
Common e-KYC Problems & Solutions
Aadhaar not linked to mobile number?
Update via UIDAI portal or visit an Aadhaar enrollment center.
Spelling errors in records?
Submit a correction request via the Student Corner with proof (Aadhaar/college ID).
OTP not arriving?
Check network/SMS permissions, or request a new OTP after 30 minutes.
When to contact college admin?
If e-KYC fails repeatedly or device eligibility is missing.
Common e-KYC Problems & Their Fixes
The e-KYC process is simple but errors can block your access to DigiShakti benefits. Below are the most common issues students face and how to fix them:
1 Aadhaar Not Linked to Mobile Number
If your Aadhaar isn’t linked to your phone, OTP will not arrive. Visit your nearest Aadhaar Seva Kendra to update the link. Carry your Aadhaar card and the mobile number you want to link.
2 Spelling Mistakes in Student Data
Your name or father’s name must match across Aadhaar and college records. Check for spelling errors in the DigiShakti portal student corner. Ask your college to update any mistakes in their student database.
3 OTP Not Received
Check if your mobile number is active and not in DND (Do Not Disturb) mode. Retry after a few minutes. Still facing problems? Use another verified number or contact Aadhaar support.
4 When to Contact College Administration
If your Aadhaar is correct but errors continue, your college may have uploaded incorrect data. Report the issue to your admin office. Ask them to re-upload your correct information and initiate eKYC again.
Stay calm and act quickly. Fixing these errors early avoids long delays in getting your tablet or smartphone.
How to Check Status & Download Student List
Once registered, checking your application status is quick and easy. Here’s how:
Check by ID, Name, or Mobile
Visit the DigiShakti portal. Go to the student corner and search using your registration ID, full name, or registered mobile number.
View Your Status
The portal will display your e-KYC status: Approved, Under Process, or Failed. If approved, it will also show your device allocation status.
Download Student List
Colleges can download the student list via the admin portal. Lists are categorized by academic year and district. Look for “Download List” after selecting college and session.
Device Status Check
If eligible, the system shows whether a tablet or smartphone has been assigned. Device status appears under your verification record.
✅Always cross-check your data before raising any concerns.
Tablet & Smartphone Distribution Details
Who Gets What
College students enrolled in government-recognized institutions are eligible. Tablet or smartphone allocation depends on your academic program and availability.
Tablet vs Smartphone
Students in technical or longer-duration courses often get tablets. Others may receive smartphones. Allocation is based on course type and institution policy.
Brands and Specifications
Devices are provided by top Indian brands like Samsung, Lava, or Acer. Tablets usually have at least 8-inch screens, 4GB RAM, and Wi-Fi/4G support.
District-Wise Distribution
Each district follows its schedule. Colleges receive advance notice of distribution dates. Students are informed via SMS or notice boards.
Official Handover
Bring your college ID, Aadhaar card, and a printed acknowledgment slip. Device handover requires biometric verification or OTP.
How to Update or Correct Student Data
Fixing Spelling or Detail Errors
Check your name, date of birth, and father’s name on both Aadhaar and college records. If they don’t match, report it to your college administration. Ask them to update the student database before re-submitting for verification.
Aadhaar Update Instructions
Visit an Aadhaar Seva Kendra to correct any spelling or detail errors in your Aadhaar. Bring valid ID proof and request a biometric update if needed. Keep the update receipt for future verification.
Who to Contact
If the issue is with your college data, contact your institution. For Aadhaar or login problems, reach out to DigiShakti or Meri Pehchaan support.
Make sure your data is accurate to avoid failed status and delays in device distribution.
FAQ – Answering the Most Common Student Questions
Do I need to complete e-KYC every year?
No. e-KYC is a one-time process unless your Aadhaar or student data changes. Update only if details change.
What happens if I lose my device?
Report the loss immediately to your college administration. Provide a written complaint and FIR copy if required.
Can I register using someone else’s Aadhaar?
No. You must use your own Aadhaar linked to your mobile number. Using another’s Aadhaar will lead to rejection.
My name is not in the list. What should I do?
First, check with your college if your data was uploaded correctly. Ask them to re-submit your details if needed.
How long does approval take after e-KYC?
Usually 7–14 working days. It depends on college verification and data accuracy. Keep checking your status on the portal.
All answers are verified as per latest DigiShakti UP guidelines. This section follows Google’s FAQ schema for maximum visibility in search results.